

The XPhase Pro S is the highest resolution 360 camera as of May 2020. It’s a 360 camera with 25 sensors, each with 8 megapixels, for a total resolution of 200 megapixels. That is almost double the resolution of the previous record holder, which was the Panono (reviewed here), which has 36 sensors, each with 3 megapixels, for a total resolution of 108 megapixels. Moreover, the XPhase Pro S is more affordable at $879 (see below for a special offer). This all looks great on paper, but how is it in real life? Is it the best virtual tour camera? Here is a hands-on XPhase Pro review with samples, detailed analysis and upcoming comparison with Panono (reviewed here), Ricoh Theta Z1 (reviewed here), Aleta S2C (reviewed here), and other 360 cameras, and a tutorial. August 7, 2019 update: Part 2 of my XPhase review posted; August 9, 2019: Street view usage added.
Executive Summary (updated August 7, 2019)
— Comparison: XPhase vs Theta Z1, DSLR, Aleta S2C, Panono (added August 11, 2019)
Specifications and features (updated May 9, 2020)
XPhase Sample photos (updated July 17, 2019)
Workflow and tutorial (updated May 9, 2020)
— Download the manuals in English
— How to straighten photos (added July 20, 2019)
— PTGui stitching template (added August 9, 2019)
— Stitching calibration (added May 18, 2020)
— Street View usage (added August 9, 2019)
Conclusion; Strengths and Weaknesses (updated May 9, 2020)
Price and availability; Discount (updated July 17, 2019)
Accessories (updated July 21, 2019)
FAQ (updated May 25, 2020)
EXECUTIVE SUMMARY (updated Aug. 7, 2019)
Here is a video review of the XPhase Pro that includes its specifications, key features, workflow and 5 uses for its high resolution.
Part 2 of my review is a comparison between XPhase vs. Theta Z1, a DSLR, Aleta S2C, and Panono.

Part 2 is here:
Specifications and Features (updated May 9, 2020)
| Lenses | 25 lenses, approx. 28mm in 35mm equivalent terms |
| Aperture | f/2.2 |
| Field of view | Fully Spherical |
| Sensors | 25 lenses x 1/3.2 inch 8mp BSI CMOS |
| Photo resolution | 16384 x 8192 (134mp) stitched 200 megapixels unstitched |
| Shutter speed | 1/4000 to 1 sec. |
| ISO | TBA |
| Exposure modes | Auto (handheld) or auto (tripod) |
| Self-timer | 5, 10, or 20 secs. |
| HDR mode | 3 shots (-2, 0, +2) |
| Stabilization | TBA |
| Storage | Removable USB drive (32GB, optional 64GB or 128GB) |
| Connectivity | Wi-Fi |
| Battery | 3400 mAh Li-Po 250 shots Nonremovable |
| Compatibility | iOS, Android, Windows |
| Waterproof | No |
| Dimensions | Camera: 60mm diameter Handle: 22mm diameter Height: 245mm |
| Weight | 248g |
| MSRP | $879 |
Key Features
Please note: the XPhase can only take photos. It cannot take videos.
HDR: XPhase can take a 3-shot or 6-shot HDR photo for wide dynamic range, and uses a special HDR fusion algorithm to avoid ghosting even for moving subjects. For a 3-shot HDR, the exposures are from -2EV to +2EV. For the 6-shot, it is from -3EV to +2EV, or -5EV to 2EV.

Genlocked sensors: all 25 sensors are genlocked and synchronized. You can capture moving subjects without ghosting.
Optical flow stitching: XPhase’s software can stitch photos automatically with optical flow stitching, resulting in smooth stitching for both near and far objects.
Rectilinear lenses: XPhase uses rectilinear lenses instead of fisheye lenses. Each photo that comprises the stitched photo uses all of the sensor (compared to circular fisheyes where a portion of the sensor is not used) and because lenses do not protrude from the camera, they are less likely to be damaged.
16-bit PNG lossless format: XPhase Pro can export panoramas in lossless 16-bit PNG format, which offers similar editing flexibility as a raw file.
Raw DNG Mode: photos can be output as a stitched equirectangular DNG photo. There is also an option to output individual exposures of the stitched photo, or even individual exposures of every lens, all in DNG format.
Interval shooting / time lapse mode: the XPhase can shoot continuously in intervals of 30, 45, 60, 90, 120, 180, or 240 seconds.
Manual exposure: true manual exposure (ISO and shutter speed), not just exposure compensation. Aperture is f/3.2, while the shutter speed is from 1/4,096 up to 8 sec.
Stabilization: XPhase has a built-in gyroscope that can apply automatic leveling.
Geotagging: When shooting with your phone, you’ll have the option to add the location to your photo.
Intervalometer: There is an option to shoot continuously at automatic intervals. The shortest interval between photos as of May 2020 is 30 seconds. There is also an option to stitch a group of photos identically for time lapse videos.
Create virtual tours: Xphase Pro includes software for creating virtual tours.

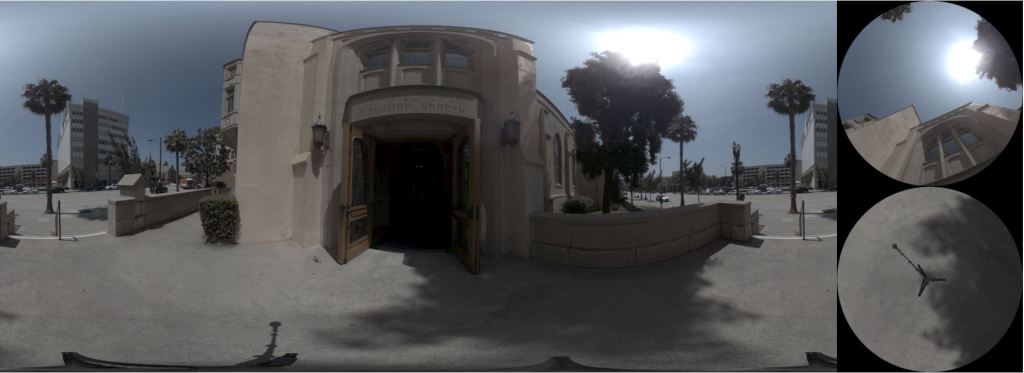
XPhase Image Quality and Sample Photos (updated May 9, 2020)
Here are sample unedited JPG photos the XPhase Pro, straight out of the camera. The exposure compensation for these was -1.3EV for the outdoor jet photo and -2EV for the indoor photos. For the photos at Disney California Adventure, you can see that there is no ghosting, even where there are people moving all around me.
Here are sample photos in comparison to a DSLR panorama, Ricoh Theta Z1, and Ultracker Aleta S2C:
The photos show that the XPhase is more detailed than any other 360 camera, and is even more detailed than a panorama shot with a 24-megapixel mirrorless camera with diagonal fisheye lens (Sony a6000 with Samyang 8mm f/2.8). It also has excellent dynamic range when used in the 6-shot mode.
Minimum Stitching Distance
XPhase claims a minimum stitching distance of 0.3m. I have been able to take some shots that were indeed stitched correctly with objects as close as 0.3m. However, I found that when there are objects within around 3 feet of the camera, there are usually more stitching errors around the panorama. I also found that sometimes, there are minor stitching errors even when there is nothing near the camera. See calibration below.
Download unedited sample files here.
Download sample unstitched ORI files here.
Workflow and Tutorial (updated July 17, 2019)
Standalone
The XPhase can be used by itself. It has only one button, and there are two LED lights. The top LED is the battery life indicator, while the bottom LED is the storage indicator. Both LEDs change color depending on the amount of battery life or storage left, according to the colors of the rainbow:
– red (less than 20%),
– yellow (40% left),
– green (60%),
– blue (80%), or
– purple (more than 80%).
Tip: with the camera off, you can check the remaining battery by pressing the power button (but don’t press more than 2 seconds or else it will turn on and startup). Note: according to XPhase, the camera will use up the battery while it is on, whether or not you are shooting. Therefore you should turn off the camera in between shots. XPhase claims a battery life of 250 HDR shots, but in real world conditions, I found I only got slightly more than 50 shots before the battery died. I therefore recommend charging the camera in between shots. For convenience, instead of removing the camera from the monopod, I remove the camera from its cap and leave the cap attached to my monopod while charging the XPhase.
Shooting with XPhase
Pressing the shutter takes a photo. The camera takes about 10 seconds to process the photo. When it is ready for another shot, you’ll hear a double beep. You can also activate the self timer by double clicking (5 second self-timer), triple clicking (10 seconds), or quadruple clicking (20 seconds).
With each shot, the camera takes a 3-shot HDR, with exposures at approximately -2EV, 0EV, and +2EV. The 3 photos are taken in quick succession (75 photos in all) and the software uses a special algorithm to avoid ghosting.

Smartphone app
The smartphone app can remotely trigger the camera, and can adjust exposure. It can also view and stitch photos but as of July 2019, the app cannot yet export the photos to the phone gallery. The app is available for both Android and iOS.
To connect with the smartphone app, turn on the camera, and search for the camera’s Wi-Fi signal with your phone’s Wi-Fi. Once connected, launch the XPhase app. The camera and app are now paired and you will see thumbnails of photos from the camera. You can now control the camera.
To change the preferences, tap on the gear icon on the upper right corner. Auto Stitch means the camera app will begin stitching the photo as soon as it is downloaded.
To change the exposure, tap on the bottom right corner. From the app you can only change the following settings:
Handheld vs. Tripod: In handheld mode, it will increase the shutter speed and raise the ISO as needed to reduce blur. In tripod mode, it will use the lowest ISO.
Exposure compensation: +/-3EV, in 1/3 stop increments
Self-timer: 5 seconds, 10 seconds, 20 seconds, or none.
There is no live preview either, so I just have to trust the exposure algorithm. In May 2020 version of the firmware, the exposure is conservative and exposes for the highlights.
When the smartphone app stitches the photo, a JPG version will be stored in your phone’s gallery. The JPG photo has 360 metadata and can be uploaded to social media such as Facebook, and be recognized as a 360 photo.
Desktop app
The stitching process can be a one-step process in the desktop app. The XPhase takes photos and saves them unstitched in a proprietary .ORI format. [The .ORI format is similar to a zip file and contains all 75 or 150 individual photos and a thumbnail. As of May 2020, the desktop app now includes the option to export every exposure of every lens in Adobe DNG format.]
The files are stored in a removable USB 3.0 drive in the base of the camera (if you want to upgrade it, see below). Insert the drive in your PC and transfer the ORI files.

You can use the PanoManager app to stitch the ORI files into either:
- 16-bit PNG
- Adobe DNG
- JPG
- PNO (a proprietary format)
When stitching as PNG, you can adjust the RGB values, and the contrast. Unfortunately, you won’t be able to preview the effects of your choices, so you will need to set these parameters blindly.
HOW TO INSTALL PANOMANAGER AND STITCH XPHASE FILES
1. Download and extract the latest zip file from the Xphase software directory, posted in the XPhase Facebook group. One of the folders will be called XPhasePro. Copy that to your hard drive (there is no installer program per se).
- In that XPhasePro directory, there is a file called PanoManager.exe . That’s the stitcher. Launch it.
-
When PanoManager launches, click on the Wi-Fi icon on the bottom left, and on the folder icon in the next popup.
-
Select the folder where the unstitched ORI files are stored.
-
When the thumbnails are loaded, click on the gear icon for stitching preferences. I recommend Auto Stitch: no, 16-bit PNG or DNG, HDR Merge, quality: High, WB: Auto, Scene: Static (if tripod).
-
Click on Select menu, then choose Select All, or Manual Select or one of the other self-explanatory options. If you choose manual select, check the checkboxes for files you want to stitch.
-
Click on Stitch menu and choose one of the options:
a. Stitch Selected Files
b. Remove Noise & Stitch. This is for long exposure noise reduction through dark frame subtraction. To use this feature, you need to take two photos. For the second photo, the XPhase must be covered completely, then shoot the same exposure. Select both the normal photo and the covered photo and choose this option to apply dark frame subtraction to the first photo.
c. Stitch for time lapse. When you use this option, all selected photos will be stitched identically. This is useful for time lapse videos, compositing, HDR, and other uses.
d. To DNGs of every exposure. Panomanager will output the individual exposures as separate DNG files, for fusing in HDR with third party HDR software. The files will be stitched identically.
e. To DNGs of every lens. Panomanager will output every exposure of every lens. This is if you want to stitch using your own stitching software, and fuse using your own HDR software.
- There may be a popup dialogue box for more stitching settings: choose Auto white balance, Color: Auto, and No Expansion (see below). The stitched files will appear in a directory called “Out” in the XPhasePro folder.

What is “PNG Output Expansion?” There is a unique option to render as an expanded panorama that is more than 360 degrees horizontally (see the duplicated palm tree in the panorama below). By editing the expanded panorama and then cropping the image to a standard 2:1 equirectangular format after adjustments, you can reduce the seam between the left and right edges.
If you choose the PNO format, you can view them in the PanoViewer app, or convert them into JPG with the PNO2JPG app.
How to straighten photos
Until stabilization is implemented, you will probably need to straighten photos. I prefer to use the free panoramic software Hugin.
Step 1: Launch Hugin and switch to Simple mode (under the Interface menu).
Step 2: From the Assistant tab, click on the “Load images…” button, and select the 360 photo that you want to straighten.
Step 3: Make sure Lens type is Equirectangular.
Step 4: Click on the Move/Drag tab, and drag the image until all vertical lines are truly vertical.
Step 5: Click on View… Panorama Editor and save the project file (File… Save).
Step 6: Click on the Stitcher tab. Under the Canvas Size, click on Calculate Optimal Size. Under Panorama outputs, select your preferred output format (TIFF, JPG or PNG). Click on the Stitch! button on the bottom right corner.
How to update the firmware and app.
- Download the latest software distribution (it will be called XPhaseEn_yymmdd.zip), and unzip the file.
- To update the firmware, look for the subdirectory called firmware, which will have a file called xphase (no extension). Copy the file to the root directory of the thumbdrive and insert the thumbdrive in your camera then turn it on.
- To update the Android app, look for the subdirectory called Android installer, then copy the apk file to your phone and run it.
- To update the iOS app, go to the App Store and click on UPDATE. If you don’t see an UPDATE button, then you have the latest version.
- To update the desktop app, copy the XphasePro or XphasePro_Mac folder into your hard drive. There is no installer per se.
PTGui stitching template
You can use PTGui to stitch the Xphase files, although in my experience there are many stitching errors, ghosting, and unusual colors. The XPhase stitching software works much better. Nonetheless, if you want to use PTGui, here’s how.
Step 1. Unpack the ORI files by dragging the ORI file onto the UnpackORI app. This will unpack all ORI files in the same directory.
Step 2. In PTGui, load all the images from the directory, except the Thumbnail file.
Step 3. In PTGui, go to File… Apply Template… and select this PTGui stitching template for XPhase.
Step 4. Click on Align Images.
Step 5. Click on Create Panorama.
PTGui has many other features that you can use to fine-tune the stitching, such as changing the control points, masking, etc.
Stitching calibration
XPhase has a calibration tool that can enable you to calibrate the stitching on your camera. It is also possible to re-stitch previously taken photos using a new calibration profile.
Here are tips for the best calibration results:
- Ideally, at least 10 meters away from everything (other than the ground).
- No movement such as cars or animals.
- Have a place to hide from the camera or stay away when you shoot.
- Have tall buildings around the camera. Those who have nearly perfect stitching with their Xphase report that this is the most important factor.
To calibrate the XPhase, you need a ballhead. You will need to take 14 shots: 6 shots rotated vertically, 4 shots rotated while the camera is horizontal, and another 4 shots rotated while the camera is horizontal and pointed to the opposite direction.
You then add the ORI files to the Calibration Tool software, which will create a calibration profile (the software will also automatically backup the previous calibration as a separate file). The Calibration Tool executable is among the files included in the distribution of XPhase software as of May 2020. Please note that you’ll need to login your XPhase account in order to use the Calibration Tool (to create an account, you’ll need to ask for an invitation code from Danny Wong, worldwide distributor of the XPhase).
Once you have a calibration profile, just copy it to your Xphase thumb drive in the root directory. When you turn on the XPhase, it will load the new calibration automatically.
It is also possible to use the new calibration profile to re-stitch ORI files. Just place the calibration profile in the same directory as the ORI files, along with the Change Calibration executable file and then run the Change Calibration file. The ORI files in the directory will all be revised with the new stitching.
Using XPhase for Street View
XPhase photos can indeed be used for Street View. Here is a sample I uploaded:
Please note however, that XPhase’s native resolution is too high for Street View, which is limited to 100mp. XPhase photos should therefore be resized to 14,000 x 7,000 (or 14142 x 7071), using any image editor including Windows’ Paint app.
Right now, XPhase does not have geotags yet, so instead, go to maps.google.com and look for the location of the photo (in this case, Polliwog Park). Click on Photos and click on “add a photo”. The photo you upload will then be automatically tagged for the correct location.
Conclusion: XPhase Strengths and Weaknesses (updated: May 9, 2020)
Here are my preliminary impressions of the XPhase’s strengths and weaknesses for the 3 P’s of the 360 Camera Buying Guide:
Performance / Image quality:
- The most detailed 360 camera in the market, with better detail than some DSLR panoramas.
- Very good dynamic range
- HDR without ghosting
- Low chromatic aberration
- Short minimum stitching distance for high resolution 360 camera (around 3 feet)
o Good stitching outdoors. Indoors, it may have stitching errors, depending on whether the environment has sufficient number of details, and distance of the camera to the nearest objects. Please see also the stitching calibration option. - Very susceptible to flare. The flare artifacts appear as multiple magenta ovals, and can result in magenta casts over portions of the image near light sources.
- Minimum shutter speed for handheld setting is too slow (1/13 sec.)
- On my first review unit, one lens was slightly back focused. I received the final version which had no backfocused lenses.
Practicality / convenience:
- Self-timer can be used without a phone
- Option for one-step stitching process
- Batch exporting
- Phone app can stitch photos at full resolution
- High speed USB drive can transfer files quickly
- Option to minimize seam line by rendering as expanded panorama
- Access to the unstitched files for patching stitching errors
- date and time recorded in the filename
- No live view
- Poor battery life (around 50 HDR shots in real world conditions)
- 30 sec. startup time
- PNG files take up a lot of space (over 500MB per file). The final version has Raw DNG mode, and each file can be as much as 800MB.
- No video capability
- Very affordable compared to other prosumer 360 cameras.
Price and availability; Discount
XPhase Pro is $879, available from Stabilizer Pro. Stabilizer Pro has a special offer for 360 Rumors readers: you can get a free Sandisk 128GB USB drive (MSRP $39.99) with your XPhase Pro order using this affiliate link. I will keep this page updated with any improvements to the camera. If you have any questions, please leave them in the comments. The official webpage is here. Join the XPhase Group on Facebook here.
Accessories (updated July 21, 2019)


Camera Case: The XPhase does not include a case, and with its unusual shape, it’s not easy to find a camera case for it. Here are some cases that I found that can work with XPhase:

This semi-hardcase fits the camera perfectly and has space for the USB adapter and cable. However, it doesn’t have a shoulder strap. For carrying the camera around, you may instead prefer one of these bags:

JJC DLP-7 is a lens case that is tall enough to fit the camera. It is very well padded, includes a shoulder strap and a velcro strap for belts and backpacks. However, it has no separate pocket for the USB adapter, although it has a sleeve that can fit the special USB charging cable. It is the most protective of these cases, but is much bulkier.
Orca Carrier is a zippered nylon case with a shoulder strap and four attachment straps. There is a zippered pouch in the bottom (which I filled with padding) and another zippered pouch on the side where I put the USB adapter and cable. It is thinly padded.
Bottlebottle is a canvas bag with a shoulder strap. It has no padding per se.
FAQ (updated May 9, 2020)
-
- XPhase claims to have 200mp resolution, but its photos are 16384 x 8192 which is only 134 mp. Why?
The XPhase has 25 sensors that each capture 8mp. This is how they claim 200mp resolution. However, the stitched resolution is only 134mp because the photos must overlap each other in order to have smooth stitching. For what it’s worth, when I input the unstitched files in PTGui, the stitched resolution is as much as 152mp (17482 x 8741). - Can XPhase do video or live view?
No, it cannot do video nor will live view be possible because of the power that would be required from 25 cameras shooting simultaneously, and the processor that would be required. - What is the difference between the old XPhase, the next version of XPhase, and the 2020 version?
- In the first version, the quality of the lenses was inconsistent, with some backfocused lenses. You can tell it is the original version because there is no logo printed on it.
- The second version was called XPhase Pro S. They used better lenses and also added new features, such as Raw DNG mode support and an increase of the HDR from 3 shots to 6 shots. You can identify the second version with “XPhase Pro S” written on the handle.
- The 2020 version has a micro USB port on the side of the handle, enabling you to charge it while the camera is attached to a tripod or monopod (by contrast, the first and second versions did not have a Micro USB charging port and instead used a proprietary power plug for charging).
- How is the battery life? Can you charge the camera while using it?
For the 2020 version, there is an extended battery handle that is designed not to appear in the photo. For the original version, battery life is not that great because it uses up the battery while it is on, whether or not you are shooting. It is possible to charge the camera while using it. However, you have to remove the base cover with the 1/4-20 tripod hole, so you’ll need another way to mount the camera to a stand, e.g. using a clamp. - Does the XPhase have stabilization? Yes.
- Does the XPhase record the date and time? Where does the date and time come from?
It uses the date and time from the smartphone and names each ORI file with the date and time of the shot. - Does XPhase have GPS or geotagging?
Yes if you shoot with your phone app and turn on the GPS option. - Does XPhase have EXIF data?
Yes, if you export the photo in JPG, or if you unpack the ORI file and view the unstitched photos. The phone app and desktop app can also overlay the EXIF on the thumbnails. - Can you use third party stitchers such as PTGui with XPhase?
Yes. You can export the individual exposures of every lens (for a 6-shot HDR, that is 150 photos) in DNG format. However, as I mentioned above, the stitching from the Xphase Panomanager software is far better than what I can get with PTGui. In addition, the Panomanager corrects the XPhase’s colors and vignetting much better than PTGui can.
- XPhase claims to have 200mp resolution, but its photos are 16384 x 8192 which is only 134 mp. Why?


Love the detailed images.
Thanks Michael! Yes the XPhase’s photos have amazing detail! I’m curious how they will compare against DSLR panos. 🙂
Great! The current non-exporting to the image gallery on smartphone is puzzling. Smartphone app is Android, and Desktop app is Windows only?
Hey there VJ. The current app is Android, although there will be an iOS version as well. Desktop is windows only.
Re mobile export, I’ve asked them to add it.
Do you have .jpg samples ?
Do you have samples showing stitching errors ?
Thanks,
Hi Pierre. I’ll upload JPG samples. As for stitching errors, you can see the sample photos in the 360 album. https://360rumors.com/xphase-review/#samples
Thanks Mic.
I don’t see many stitching errors. One on your hairs, and one or two in the Tesla.
About the interior of the Tesla, did you take it ? Has it been retouched ? Because space is very tight and stitching is acceptable.
Thanks Pierre. For the tesla i didnt retouch the stitching
Looks like this camera is a resurrected and remodeled version of the Staro camera that never made it beyond CES 2017 https://360rumors.com/ces-2017-sample-photos-from-staro-136/
Yes they have many similarities. I don’t know if they got the IP from Staro, or it was created by ex-Staro employees. Anyway the good thing is that it’s finally available.
Yup the crucial difference is that xphase is actually available now 😀
Have you or anyone one bought a 360 camera from this Chinese supplier and what import duty or other taxes have had to be paid?
I didnt get charged anything. Im in california. Ymmv
Thanks for the carry case recommendations. My Pelican camera case is already pretty full, so I definitely will need a separate case for the Xphase. I ended up ordering this one from Amazon. Looks like it should be a good fit with padding and a couple zippered pouches for accessories.
https://www.amazon.com/gp/product/B01LWZU4WT/ref=ppx_yo_dt_b_asin_title_o00_s00?ie=UTF8&psc=1
I downloaded a couple of the sample PNG files you uploaded to Google drive When I open them up in any pano image viewer or Photoshop on my Windows PC, they look very dark with flat colors. Like ungraded video. Is that how the exported PNG files are supposed to look?
Thanks John. Re PNG you have two options for export. One is graded and the other is “raw sensor data”. The ones you downloaded are the latter.
Re wild wolf i saw that but it is open on top. If it is raining, your camera could get wet
I received my Wild Wolf bottle holder from Amazon yesterday. It has a drawstring at the top, so you can close up the top if it rains.
Thanks John. How’s the padding?
The Wild Wolf has pretty decent padding for a water bottle holder. Double-layered neoprene inner lining. It should provide adequate protection. I won’t have a final verdict until my XPhase Pro arrives next week and I can see how well it really fits.
Thanks
Hi Mic is the xphase is already on market. Do you have the link to buy these camera. Thx n rgds
Hi Sandi. Yes i put a link in the article. You can also buy here bit.ly/buyxphase Stabilizer Pro said they will give a 4% rebate with that link.
Link doesn’t seem to give 4% rebate! Any rebate code/cupong for 360rumors readers?
Hi Reza. They changed the offer so that now you will get an additional free 128gb drive in addition to the 32gb
Hi Mic
Woudl it be possible to get the ORIGINAL 75 imgs for download ? looking for solution for photogrammetry so need evaluate the per image quality. Would it be possible to make 2-3 positions, separated say by 50cm so it can be used for 3D reconstruction ? single position is not enough.
Hi Milos. Yes you can extract the 75 images with the UnpackORI app.
Will XPhase have a service representative in Europe?
This in case of malfunction or small mandatory adjustments or update.
Sending back to China will cost a fortune and a lot of custom issues
I think someone applied to be a distributor. Check the FB group
Mic,
Last night I imported the 75 jpegs unpacked from one of your sample ORI files into Lightroom CC. They all did have exif data; focal length, f/stop, exposure, ISO, etc. They even have GPS coordinates. I brought up the map of the photo’s location in Lightroom. The coordinates were from a location in China. You took them in Pasadena I believe, so not even close! LOL
Uhuh. Supposedly the app will add correct geotags in the future
Hi Mic, how does the XPhase handle low light conditions and do you know if there are any plans to add in a live preview mode for both Android and iOS devices? Thanks very much.
Hi Denzil. I tested it indoors, but it still used ISO 100. I will test it in lower light. No I don’t think live view is possible because of the power drain and processor workload.
Hi Mic,
I make 360 virtual tours to Google Street View by DSLR and phisheye lens. At last times I made a few tours with more then 120 shperical photos. The biggest problem of that method is a time of making photos and the stitching. Xphase looks like the resolution of my problem. But how large is a one shperic photo? Is it useful in tipical virtual tours? Not! I’ll have to shrink panos to usable size. I will be able to save the actual size only on specialized internet services, isn´t it? Sometime I use MiSphere, but the quality is not sufficient. Should I buy an XPhase or another camera for a photo shoots only? Thank you for telling me the truth about One X. I wanted to buy it for work, but now I don’t know.
Hi Zdenek. Each photo is 16384 x 8192, which is comparable to a DSLR panorama resolution. For photo shoots, the best 360 cameras right now seem to be XPhase and Theta Z1. One X is ok for low resolution capture. I’ll compare them soon.
Will the camera be able to take 3D VR pictures in either 180 or 360?
Hi Mic, great review. I’m just about to jump in to the world of virtual tours for real estate and hospitality. I was about to purchase the Ricoh Theta Z1, but now it looks like the XPhase might be a better solution, both on image quality and price, so I’m looking forward to your comparison. Could you specifically look at the differences in regard to real estate virtual tours?
Hi Mark yes i will talk about using for virtual tours but maybe in the second video
Hi Mic,
Like to ask, if you use the newest firmware for the Aleta? Because this Cam getting better and better with every update. So i can better judge your coming comparison with the XPhase. Thanks in advance, Uwe
yes in my latest test i used the latest firmware
Thanks for the great review! I am doing a virtual geology tour product with the Insta360 One X and it really isn’t sufficient for photos. I was leaning towards getting a Z1, but am pretty intrigued by the Xphase. I know you’ve got a side by side comparison in the works, but based on your experiences so far, could you comment on how the Z1 and Xphase compare for photos (quality, workflow, etc.)?
Hi Jason. Z1 has better stitching (no surprise given that it only has 2 lenses) and arguably better workflow thanks to its lightroom stitcher. Right now z1 also has better dynamic range, but I expect that when Xphase adds 6 shot hdr, it will have the same or better dynamic range as Z1. XPhase also has far greater detail than Z1.
Was just about to go and order this and after clicking on your link the price on the website is $879. This is a significant increase from the $599/$699 prices. Not cool. In fact the company who is selling this is taking advantage and price gouging. Not cool!
Hi MH. The problem with the 699 version is that it has backfocusing (see my video review). They decided to get a better lens, and also will be adding new features: 6 shot hdr and raw dng mode. This hardware upgrade is the reason they increased the price. I can find out if they still have the original version for sale.
Hi Mic
What’s typical JPG filesize? Couldn’t find any within your samples pack.
Over 500mb png is very inconvenient.
Thanks
Hi Matt. In my Google Drive folder, there is one jpg there. JPG is around 125 to 150mb.
HI Mic,
Thanks for the great review, it seems like they first concentrated on image quality but not the secondary features. I wonder how would be the interior poor light conditions. I guess there will be no Live View later as its too much battery draining and processor power need. But still a fast low-res preview pano would be nice which we can directly check on mobile in couple of seconds. So we can decide if the spot is right or not! Idk maybe already they have.
Most urgent features i guess:
-GPS Geotagging
-Expanded Exposure Controls
-dng Raw
-additional battery pack or charging via powerbank simultaneously while shooting
In that case, i would definetly consider buying for “Real Estate Shootings”, Live preview or video mode are not a huge need and doesnt bother me at all.
Thanks Cankat. Indoor low light is not a problem, as long as there is enough light for 1 sec. shutter speed. If there is enough light to read a book, then there is enough light for the XPhase.
After taking the photo, it takes about a minute to see the stitched image. That’s what I use to review the exposure and check for major stitching errors.
Yes they will add all those features. 😀
Stay tuned for part 2 of my review, when I compare it to a dslr…!
Low light condition pictures?
Hi Fabrizio! Yes i will post some
The camera doesn’t stitch the pictures itself?
Will there be an Apple Mac Desktop App?
Hi Werner. No it does not do in-camera stitching. And sorry there is no mac app. Only ios, android, windows for now
Does this mean that you are working on an Apple Mac App?
Sorry, there is no mac app right now. you can join the xphase group on facebook if you want to start a petition for a mac app.
Can you work as a pro with the camera if you have no Windows-PC???
Hi Jorg. Yes it is possible to stitch using the phone. The other way is to use a Windows emulator on the Mac.
Thanks for the review. Have you done a direct comparison between the Z1 and the Xphase?
I can’t get over the price of this thing, great value! I haven’t had my One X for very long and I already feel the need to upgrade. The image quality from these cameras just keeps improving.
Thanks Stephen! I will compare the XPhase and Z1 in part 2 of my review! 😀
10 seconds to process a photo? well, can’t see what sort of time lapse they will offer, if only at lower resolution
Interesting camera, although the proprietary file format is a major dealbreaker for me unless they either document the format, release source code for UnpackORI, or the ORI file format isn’t as proprietary as you’ve made it sound.
Do you have a sample ORI file somewhere for analysis?
Hi Andy. Yes i have a sample ORI file in the article, also a link to unpackori. Not sure why it’s a big deal… You can unpack it if you want. And having one file is more convenient than handling 75 photos per shot.
Hmm… I see your links to unpackori, but your samples link at https://drive.google.com/drive/folders/1oOE7-i9rbnenLvzaB7bEI3itxvXuGQxO does not have any ORI files.
You did post a link that included a sample ORI file on Facebook – unfortunately, it’s a nonstandard format.
As to the remainder of your response:
“Not sure why it’s a big deal… You can unpack it if you want.” – It’s a HUGE deal because I can’t unpack it “if I want” – I can only unpack it if I’m running Windows on an x86 platform, and only if I don’t lose the copy of an executable that is only available on a third-party review site (apparently not directly from the manufacturer themselves- WHY?)
“And having one file is more convenient than handling 75 photos per shot.” – not a justification for ORI when there are a MASSIVE number of standard well-documented methods for solving THIS problem without reinventing the wheel. ZIP, 7-Zip, RAR, any number of compression algorithms wrapped around TAR – or for files already compressed (such as 75 JPEG files), a TAR file without any further compression. All of these formats have the advantage that the files won’t become completely useless to you if the manufacturer goes out of business, the OS the unpacker was built for becomes obsolete, and no one has reverse engineered the file packing format (look what happened to Panono users).
There is not a single justification provided by xphase why they couldn’t just use TAR.
Keep in mind – xphase had a perfect opportunity to “pick up the pieces” after there was negative press coverage of Panono after their only officially supported method for stitching was shifted to a per-image fee. Someone attempted to plug xphase in the comments of DPReview’s discussion of that fiasco, and the consensus from multiple users including myself was, “This UnpackORI garbage is only slightly better and has no justification.”
I was really tempted by this camera, but unless the ORI format is replaced with a standardized and documented format (such as TAR), or the ORI format itself is documented so that it can be extracted on platforms other than Windows on x86 and amd64, it’s a major dealbreaker.
There’s also references in the article to an Android app that can’t be found on the Play Store (at least not by searching for xphase) and can’t be found in the article (at least, at the time I am writing this, not a single link anywhere in the “smartphone app” section). Another huge red flag for someone whose experience with a Mi Sphere is 90% dependent on third-party apps because the first-party support is so awful.
I cannot seem to edit comments, but:
Your link to the ORI files is only accessible if someone has accessed your link provided on Facebook, which marks the base directory as “shared with you” for someone. Someone reading the article only has access to the “Sample unedited PNG for personal use only” subfolder.
Hi Andy.
1. ORI files – Try https://drive.google.com/open?id=172f1pDhAjVmyIvK6Kqvvf3vVlX6s0ffB
2. UnpackORI on Windows only: yes that’s true. They never said it’s compatible with Mac or anything.
3. Yes I understand, but they chose to create their own ORI format. Not sure why either (maybe it is easier to save the files in that format?) but it is what it is. I can suggest to them to use a standard format but I don’t know if they will.
4. I understand why you are angry about unpackORI and I respect your choice. But ultimately we can’t force them to use another format if they don’t want to.
5. The android app is in the ios store but not in google play store, but the app can be sideloaded.
Is it me or the price now is 879 usd?
yes the price went up because the first version had some backfocused lenses. They are getting better lenses and increasing the hdr to 6 shot, and will enable raw DNG mode.
Hi Mic! I downloaded one of you samples (you at the concert in the park) which was a .png 193.2MB. The file looks amazing on screen, but in VR it doesn’t look very good compared to most photos found on Google Earth (wander app). For example, here is your photo uploaded in test VR page: https://vr360.tours/vr/test5.html. I am wondering if I am doing something wrong or if perhaps DSLR does make a noticeable difference when viewed in VR?
Hi Bo. It’s hard to say without seeing what you’re comparing it to. It could be that you’re seeing better dynamic range. The Xphase I used has limited dynamic range because it is only a 3-shot HDR with a 1/3.2 inch sensor. When the 6-shot version with Raw becomes available, I think we’ll see a big improvement.
Any word on their update?
Considering the distance between the lenses I wonder if they could do something clever in software and provide a stereoscopic image as well.
did you find an answer to this? could you use the isolated images with third party software to create a stereoscopic image on your own?
No you can’t. Not enough overlap.
Thank you for the in-depth review. Appreciate the real-world detail comparison shot (reading the plaque about General Chilton).
Besides storage capacity and built-in-battery, are there any factors that limit the ability to take consecutive photos? I know the Panono would be susceptible to overheating…
Thanks,
Ryan
Hi Mic,
First – great review.s Very detailed – particularly in comparison to other cameras. It’s clear that you put a lot of time into your reviews.
Do you know if there any plans to sell this on Amazon, B&H or other established camera retailers? I’m very interested in this. I have the Nikon 360 camera and I’m VERY disappointed with the detail. Also, I’m generally skeptical of buying from sites I’m not familiar with.
Thanks
Thanks Rob. AFAIK, the distributor Stabilizer Pro has no plans to put it on Amazon or B&H. Probably Amazon’s commission is too high.
Hi Mic,
Thank you as always.
The stitching configuration screen cannot be displayed.
Hi Hiroshi-san. Just tap or click on the gear icon on the upper right corner. Best regards, Mic
I am keeping my eyes on this one… Loved the $699 price… Will wait for lots of real world examples and see how their firmware update cycles go before shelling out $879. Still a great price, but want a fairly mature product before $$$..
Thanks as always Mic!
Thanks Andrew! Yes same here – waiting for the fw update that enables 6-shot HDR and Raw.
This camera is going to be a gamechanger for the pro dslr market, next version, double the rez, gps, video and all whats wrong with this one and byebye pro dslr shot panos I think….the nodal ninjas and others will be worrying on this baby….
The price on this is incredible even with what is wrong with it sub 1k for 25 cameras
This is the gamechanger for sure
Hello Mic!
1 – Is there a manufacturer website with support & downloads?
2 – You mention a start-up time of 30 seconds. I think this makes the camera quite useless in day-to day shooting. I use the Panono and its ~5 seconds of start up time are already a pita when you’re on a sightseeing trip, or trying to capture an event, drive by a nice location etc. And you cannot leave the camera on all the time as the battery will be empty soon. Are there any plans to get down the start-up time to anything reasonable?
Hi Chris. The de facto support website has become the Facebook group. It not only serves as a hub for sharing photos and for discussion, but it is also where the manufacturer has been posting app updates and responding to questions.
Best regards,
Mic
Hello Mic,
Is it confirmed that the Pro S will come with a hard case?
Is it possible to get a dimension of the extra space at the side as i want to buy a tripod that fit in the case.
Thank you
Yes it will have a hard case. The case has foam cutouts that can be reconfigured. The size of the interior of the case is about 5 x 8 x 10 inches. Best regards, Mic
How can I extract the .ori file with a mac?
I think you will need a Windows emulator.
I’m interested to see how much the dynamic range improves with the 6-shot HDR and how it handles low-light scenes.
Is there a way to embed the pictures, on the Xphase cloud, to a website? It appears that the cloud only allows sharing, not an embeddable link. Does a person have to use a 3rd party to create an embeddable link?
Hi,
I bought the XPhase in November and uploaded a lot of shots to GSV over the last weeks. Only one pano (Hoflößnitz summer pano) isn’t shot per XPhase, all other panos of my account are done per this great little camera. Nearly all images was shot at -2EV, stitched to RAW PNG and fine adjusted in postwork.
https://www.google.com/maps/contrib/111730697445555884407/photos/
Best-
Micha
Thanks for sharing them Micha. I think they look great!
Has no one used the most current version?
I’d like to know that as well.
You could look at the XPhase facebook group and ask your questions there.
Yes that group is an essential resource for XPhase. It is moderated by Danny Wong, the exclusive retailer for XPhase and it functions as the de facto support group for XPhase.
I can’t find the XPhase app on Android Google Play Store. Do you know if they renamed or removed it?
It has NEVER been available on the Play Store. Only directly from xphase.
Much red flag, such wow.
Hello,
i would like to ask you if you have tried or think that this camera is good enough for photogrammetry project, for 3d reconstructions.
thank you in advance, (i loved the review)
Thanks Saad. I have no experience with photogrammetry so I don’t know. I invite you to download the sample files so you can evaluate.
Best regards,
Mic
Hi Mic. Do you see any reason why this wouldn’t with with Matterport software?
Matterport only works with selected 360 cameras afaik. But I tried XPhase with Benaco and it worked. See here: https://youtu.be/1XKKzzE2AU4
How is the image quality of the XPhase compared to a Google Pixel 3XL photosphere mode?
Hi 360Drone. I don’t have a Google Pixel 3XL to test so it’s hard to tell. I suspect the Google Pixel may have similar detail but the stitching will be much worse. Also it’s much harder to use the Pixel to take 360 photos of scenes with movement. And for dynamic range, I am guessing XPhase’s 6-shot HDR mode will have better dynamic range.
Hi Mic
Another excellent review and is my choice to get asap but still thinking of Labpano Pilot series and a bit confused, so monitoring all your updates.
An Off Piste Question Please, What Software do you use please for your comparison reviews on this site which have been excellent in narrowing down my choice, especially the Mirrorless/Lens combos and Xphase Pro etc?
One of my requirements for work tours is a side by side comparison in time and apart from the very expensive per month Muddy Boots, SaaS such as Cupix, 3i, Openspace, Docusketch etc, 3DVista and other Pretty civilian Tour Software don’t appear to offer that option or am I wrong!
I know that you have talked in the past of Roundme and I can see Roundme examples and lately some of your reviews have the Teliportme Logo, Top Left.
What’s your Secret Please, is it Roundme and Teliportme and if so, which do you recommend?
Thanks again for all Print Reviews and your 360 Rumours YouTube Site, so good, surprised it’s not pay per view.
PS Your latest Broadcast with Mr Ben steered me towards the XPhase.
Apologies for the ramble and Take Care as you Guys have it worse than we do in NZ with The Plague!
Cheers
Hi Konrad. I’m almost done with my next virtual tour camera comparison. Re side by side, you can use https://360rumors.com/360-camera-comparison-tool/ Neither roundme nor teliportme have side-by-side. I had to create it myself…
Best regards,
Mic
Hi Mic, I have another question regarding the XPhase. Will there be another model of this camera coming out soon with new hardware features? For example, the XPhase Pro became the XPhase Pro S.
Hi Mic
Thanks for your reply, I am familiar with your excellent camera comparison-tool as that has helped on viewing the superiority of the Mirrorless/DSLR combo lenses and the One Shot 360 cameras which in turn vary so much.
Your reviews are always detailed but that site of yours has been a revelation, thanks.
I was referring to the Menu items at the base but now as a Noob, realise that the best software packages have the option of having rooms etc within the tour and I can instead have the same location at different times etc.
Thanks again and looking forward to your next production.
Cheers
Love your videos and reviews. I’ve been shooting Google Street view virtual tours for about 7 years (when the street view pro program actually meant something), and have recently decided to move to a more convenient format other than my Nikon/Sigma combo, so I’ve been reading a lot of your reviews and looking for a new way to shoot tours. Tours were a large part of my business in 2015, and each year since, they’ve become a smaller part of my business, probably less than a few percent at this point. However, for obvious reasons, I wanted to ramp up this aspect of my business, as I already have a fairly large portfolio.
Cost isn’t really an issue, I’ve been between the Theta Z1 and the i360 pro 2, and even a matterport for about one day, and even though I had both pre-ordered, canceled today to order this… Your review a few months ago made me discount this because of the chromatic aberration, and how dark the back of the room was.
Anyway, hate to ask you such a question, but if money isn’t an issue, would this be a better choice than Theta Z1? I360 pro 2 seemed overboard, and mainly for video. Plus I couldn’t tell, it appeared like I’d get better results from a DSLR anyway If I were to go that route…
Thanks Brian! The XPhase is much better than the Z1 for detail and has similar if not better dynamic range using the “HDR6+” setting. The issue is that when shooting indoors, there is usually one stitching error. It also has glare. That’s why I think it is only for photographers who either don’t mind the errors, or have the skills to fix them. Given your experience, I think the XPhase could be a good camera for you. I suggest downloading the sample photos I provided to see how well they fit your workflow. Please note also that there are now extensive export options, including the option to export the stitched photo as individual exposures with identical stitching (similar to PTGui blend layer), or even the option to export as individual exposures of every lens. Note also that I will be posting a virtual tour camera comparison today that will include the xphase.
Re insta360 pro 2, the minimum stitching distance is around 6 feet or more, so I wouldn’t use it for an indoor virtual tour.
Best regards,
Mic
Thanks for the response. I saw your note about stitching errors, I don’t mind some very minor ones, depending on the client, but usually if you’re going to get those you can even get those with DSLRs unless you spend a little bit of time setting control points in PTGUI. Sounds to me with a little work, it should be okay. Anyway, any recommendations on things, including the tripod used for this, make sure to send me referral links, I’ve only ordered clicking your referral links.
Thank you very much Brian. For virtual tours, I prefer to use a Linco light stand. The legs can be used either fully extended or fully collapsed, and everything in between, that’s why I like it. 😀 This one is for 10 feet: https://amzn.to/2AAU0K9 This one is a pair of 8 foot stands: https://amzn.to/3dQrUJa These ones are steel. They have aluminum ones but I don’t know if they are good. I’ve only gotten their steel stands for stability and durability. Please note you may need an allen key to tighten the tripod connector.
Thanks! I was thinking about picking up the Bushmen V2, but was a little concerned with tipping over, so these seem like they might be more stable, and more versatile depending on the circumstances. Do you think these are stable enough for indoor and outdoor shooting?
FYI, Good call on the tripod. This is excellent. I don’t care about bulk or weight when it comes to stability, and this can be as stable as needed for almost any condition. Also, on a side note, I purchased a tripod dolly back in 2015 to make moving the camera easier but had an issue with stitching errors due to bumping, etc. so I shelved it… Now that I’m using XPhase, it pairs up nicely with this tripod, making it easy to move along floors for larger tours. So far, getting used to the workflow, but I got some good results today after spending some time in Photoshop… I’m still old school, I really should learn Lightroom, I’m paying for Adobe CS anyway, but have spent no time in lightroom…
Hi Brian,
I use the XPhase for GSV since a few months and if you like here you can find all my XPhase panos (all panos since november):
https://www.google.com/maps/contrib/111730697445555884407/photos/
For pro use you need a good workflow for the tone mapping. Quite good works stitching to linear 16bit DNG and postwork per ACR. Stitching errors are quite seldom, if your camera is good calibrated. It can be done per easy tool and maybe needed every few months.
The weakest point are some color issues, so shadows shows some color clouds some times or at the sky magenta areas are visible. But most it can be fixed. I like the 3HDR mode at -1EV. It’s a fast mode and the dynamic is quite good.
The big advantages of the XPhase are quick shot snapshots and the great resolution.
-Micha
Thanks, my xphase is ordered so I’m just going to see how it works. Your shots are great, surprised there was no blurring with the people in the photos. I’ve only ever shot dSLR, though I did try a Samsung 360 with poor results.
I blurry people only if needed. Some times I ask the people to keep them sharp – for example owners of the location. Other people get a blurry effect. I try to fake a motion blur so that the blur looks natural.
The biggest advantage of the XPhase over the DSLR is creating snapshots and to allow quick shots on a long monopod. It makes fun to find special place for XPhase shots. Here an example of a great location from Andreas:
https://www.facebook.com/photo.php?fbid=3058125190884433&set=g.675300729579105&type=1&theater&ifg=1
Hello,
Great review so I purchased the camera, but I can not connect to wifi at all…………. says connected on phone but when i go to app it says disconnected. Not as you demonstrated.
Most annoying to say the least.
Have you had any such issues or heard of this major problem?
Thanks
Hi William,
Could I suggest you join the Xphase Facebook group? There are a lot of users who can help.
Re: the WiFi connection. Make sure you select the Xphase Camera network in the WiFi settings on your phone.
Regards
Dean
I need to make 360 views from inside of big machines. This kind of camera with that resolution would give me much more possibilities than a DSRL with fisheye (currently I use a A7 II with Samyang 8mm).
I am not sure about the minimum focal/stitching distance.
In addition, I did not found any suppliers in Europe and not much feedback/reviews.
Almost 1000 bucks excluding custom duties.. difficult decision.
Hi Tefod. XPhase minimum distance is supposed to be 1.5 feet (0.5 meters). But sometimes even when an object is far away, straight lines can appear curved or wavy. Is that ok? If yes, then XPhase is a good option. If not, then you could try another 360 camera such as Theta Z1 or Qoocam 8K or Mi Sphere. Qoocam is actually good at short distances.
Best regards,
Mic
You could discuss your need at the XPhase FB group, it’s a quite lively community. You will find some car interior shots which could similar to your need. So you could see the level of defocus and stitching quality for tight spaces.
Hey do you know if there is a UK or European seller?
Hi Alex. Yes stabilizer-pro.com.
Is this camera recommended if I walk the construction site which is indoors? I need a camera that can track the GPS path and able to export the data. Any recommendations if not this camera?
Hi Vasu. You can do that with XPhase, but please note each shot takes about 30 seconds. So you would walk, stop, walk, stop. You can’t just keep walking unless you walk at a snail’s pace.